Add integrated lighting
Please understand that modifying your sewing machine involves working with potentially lethal mains-level voltage. Do not undertake this project if this makes you uncomfortable. Understanding & utilizing safe electrical practices is critical to your safety and successfully completing this project. Only start working on your machine while it's completely disconnected from the mains power socket. By agreeing to follow the below guide, you agree that the authors cannot be deemed responsible for any damage you induce. It will be entirely your fault!
Why Add Integrated Lighting?
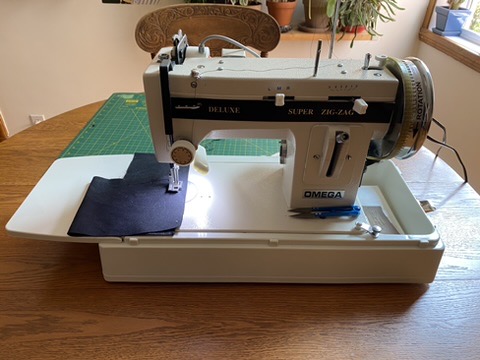
In this guide, I will show how I added integrated lighting to my mini walking foot sewing machine, an Omega (Sailrite clone). Good lighting is critical when sewing as it allows you to properly see the stitches coming out of your machine and ensure things are looking good. I have used battery-powered lights attached to the machine with magnets or Velcro, but I always forget to keep them charged, especially when the machine may sit idle for months.
I purchased a cheap magnetic light made for sewing that attaches magnetically to the machine. It had a 110v plug and worked great. The only downside was it required its own socket. I want to plug my machine in and have the light working, not needing to plug in an extra cord for lighting.
Installing the Integrated Light
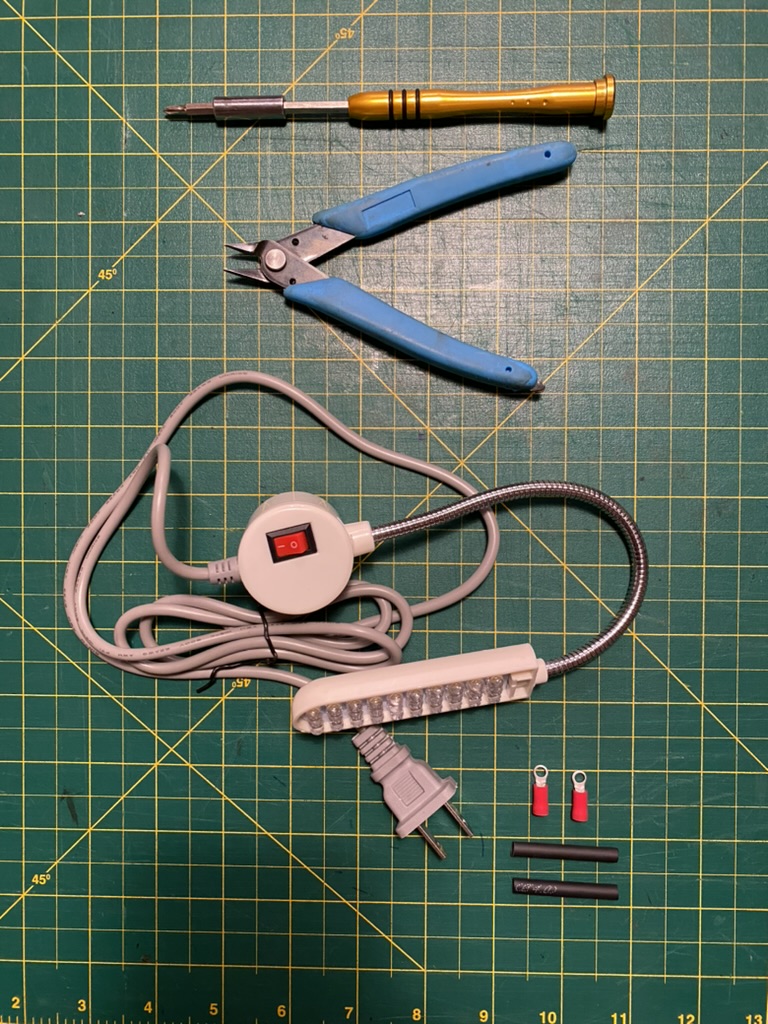
Bill Of Materials
-
110v Light
-
2x Crimp Ring Terminal - #6 Screw
-
2x Heat Shrink Tubing
-
Screwdriver
-
Wire Strippers
-
Multimeter
Step-by-Step Instructions
-
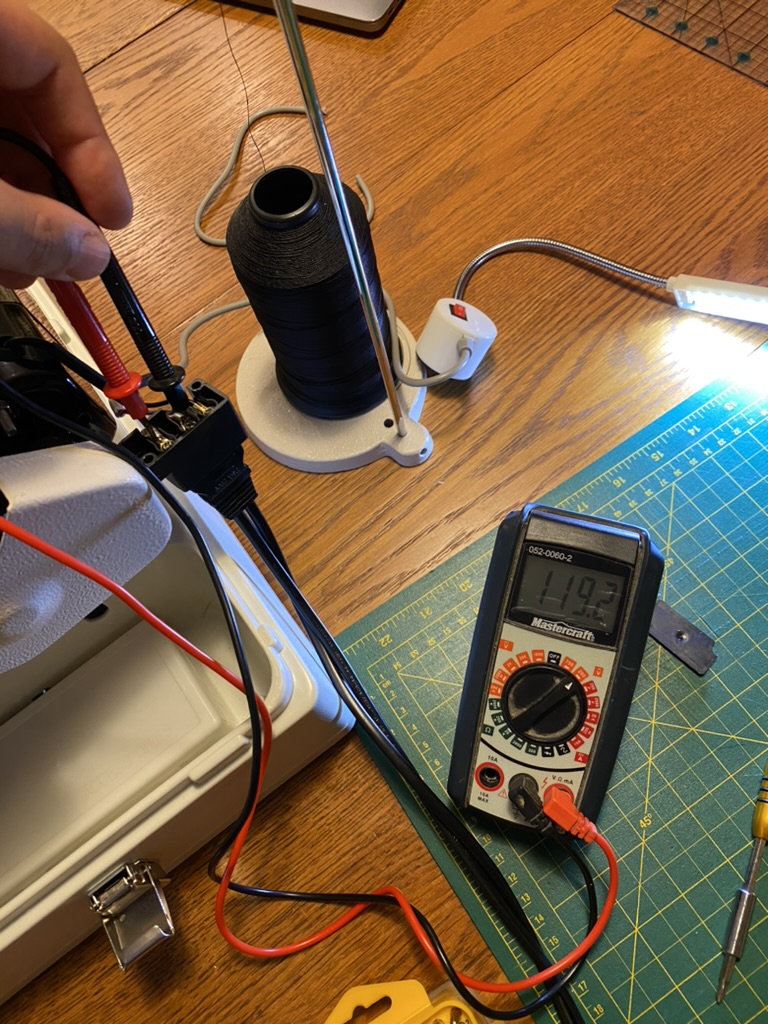
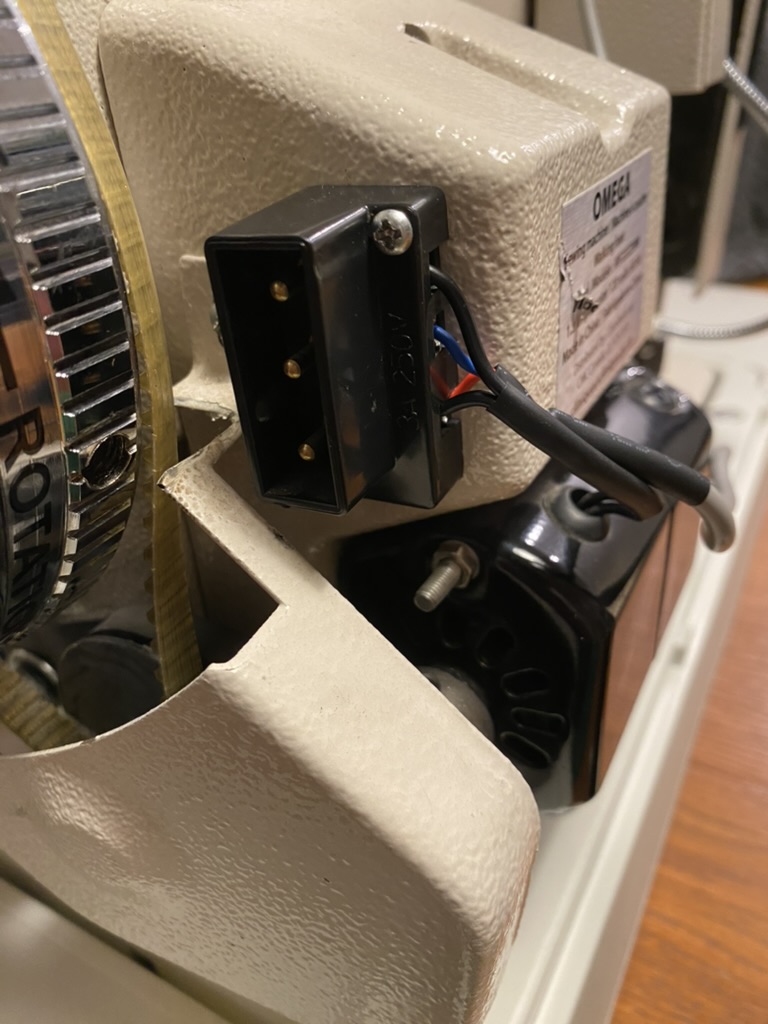
Find where to connect
- Remove both screws and the plastic back plate to expose the connection
- Use a multimeter to find two connections that read 110v when the pedal is not pressed. Verify that the voltage is consistent whether the pedal is pressed or not. In my case it was the middle connection that had no wires going to it and either ones that had an existing connection.
-
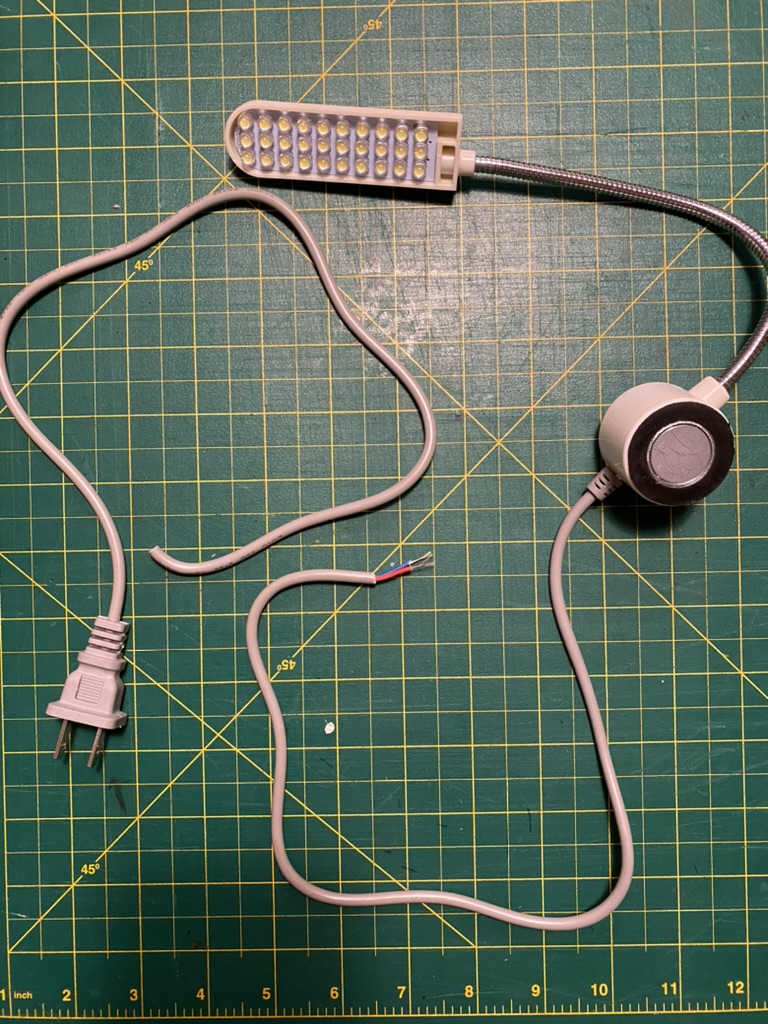
Cut the light
- Using wire cutters, carefully cut the power cord of the light leaving enough length to place the light anywhere on the machine.
- Using wire cutters, carefully cut the power cord of the light leaving enough length to place the light anywhere on the machine.
-
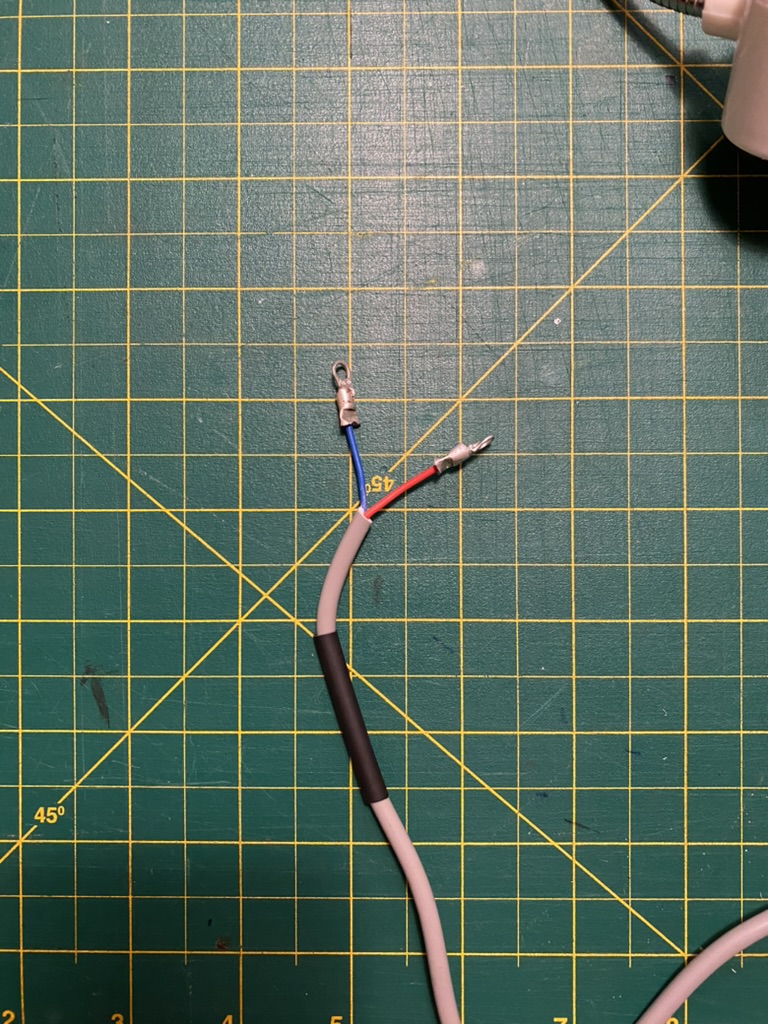
Crimp on 2 ring terminals
- Slide heat shrink tubing onto the wires before crimping.
- Crimp a ring terminal onto each exposed wire end.
-
Attach the light
- Connect the ring terminals to the machine’s power connections where you measured 110v.

- Connect the ring terminals to the machine’s power connections where you measured 110v.
-
Close it all up
- Reassemble the connection casing, ensuring all components are securely fastened.
- Heat the heat shrink tubing to clean up the wires.
-
Test
- When the machine is plugged in, the light will turn on. Ensure everything works properly when pressing the foot pedal.